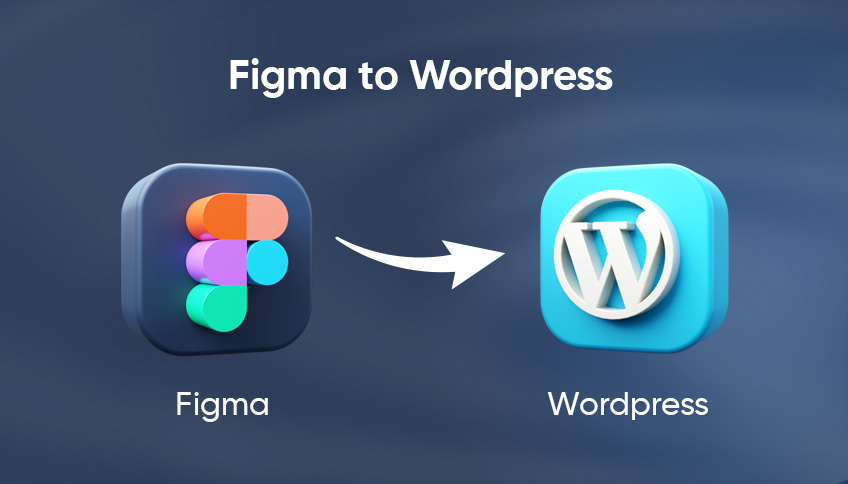
Ever stared at a stunning Figma design, pixel-perfect and brimming with creative energy, and then felt that familiar pang of dread? The one that whispers, “How on earth do I turn this beautiful vision into a live, breathing website?” You’re not alone. This chasm between a designer’s masterpiece and a developer’s functional reality is a tale as old as web design itself. But what if I told you that bridging this gap, especially when it comes to platforms like WordPress, isn’t just possible, but can be an incredibly rewarding journey?
Why Figma? The Power of Design
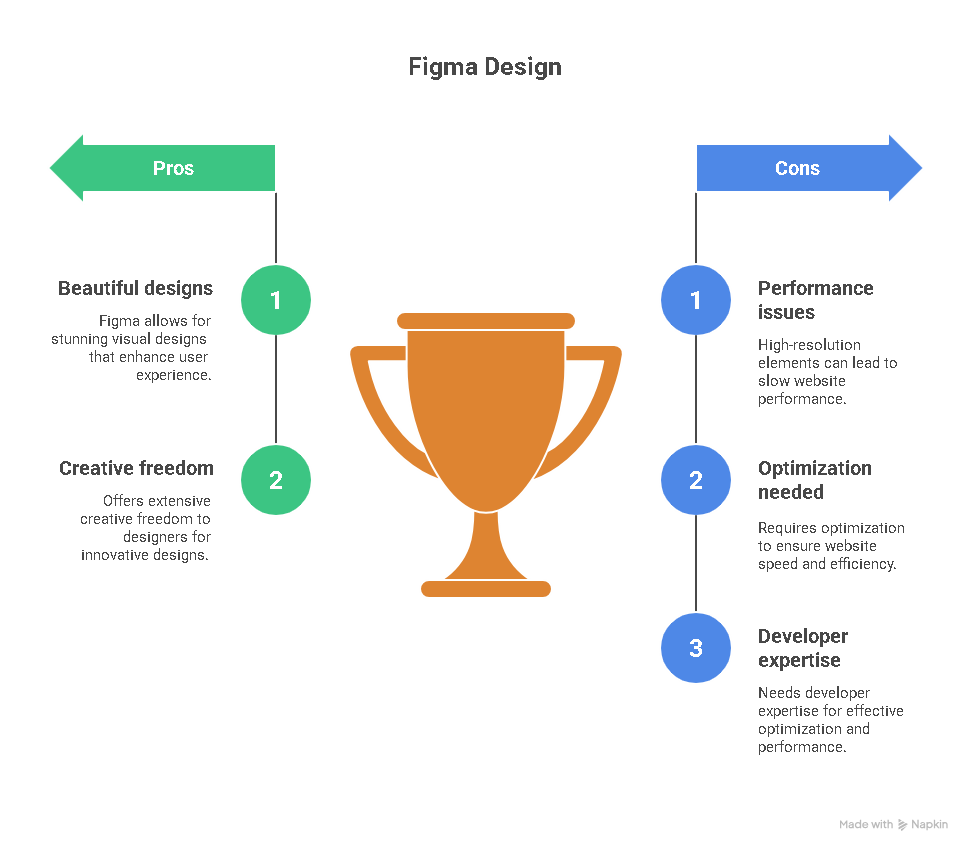
Before we dive into the nitty-gritty of conversion, let’s take a moment to appreciate the star of our show: Figma. For many of us in the design and development world, Figma has become more than just a tool; it’s a collaborative ecosystem. Its web-based nature means real-time collaboration is a breeze, allowing designers, stakeholders, and even developers to jump into a project simultaneously, leaving comments, making tweaks, and generally fostering a more unified workflow. This isn’t just about convenience; it’s about efficiency and reducing those frustrating feedback loops.
Figma’s component-based architecture is another game-changer. Imagine designing a button once, defining its states (hover, active, disabled), and then reusing it across hundreds of screens. If you need to change its color or font size, you do it once, and it updates everywhere. This level of consistency and speed is invaluable, especially for larger projects. It helps maintain a cohesive brand identity and significantly accelerates the design process. The ability to create intricate prototypes directly within Figma also means designers can simulate user flows and interactions with remarkable accuracy, providing a clearer vision of the final product long before a single line of code is written.
Ultimately, Figma empowers designers to chase that ‘pixel-perfect’ dream. It provides the tools to craft visually stunning, highly functional interfaces with incredible precision. But herein lies the rub: the more intricate and polished a design becomes in Figma, the more challenging it can feel to translate that exact vision into a live website. This brings us to our next point: the conversion conundrum.
The Conversion Conundrum: Challenges and Pitfalls
So, you have your flawless Figma design. Now what? This is where the real fun begins, and by fun, I mean the potential for a whole lot of headaches. The path from Figma to a live website is fraught with challenges, and being aware of them is the first step to overcoming them.
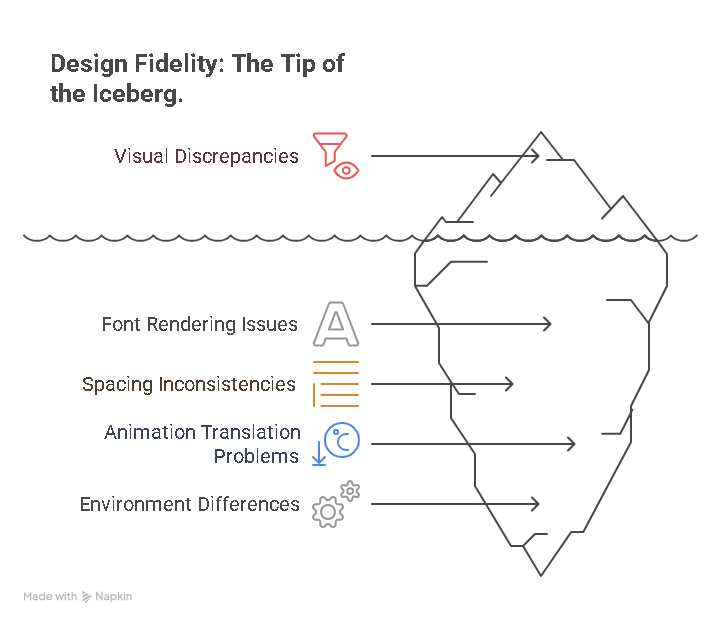
Design Fidelity: This is the big one. You’ve spent hours, maybe even days, perfecting every last detail in Figma. The typography is just right, the spacing is immaculate, and the color palette is a work of art. But then, you start the conversion process, and suddenly, things look…off. Fonts might render differently in the browser, spacing can get wonky, and those beautiful, subtle animations you designed? They might not translate at all. This loss of visual accuracy is a common frustration, and it often stems from the fundamental differences between a design environment like Figma and the dynamic, unpredictable world of web browsers.
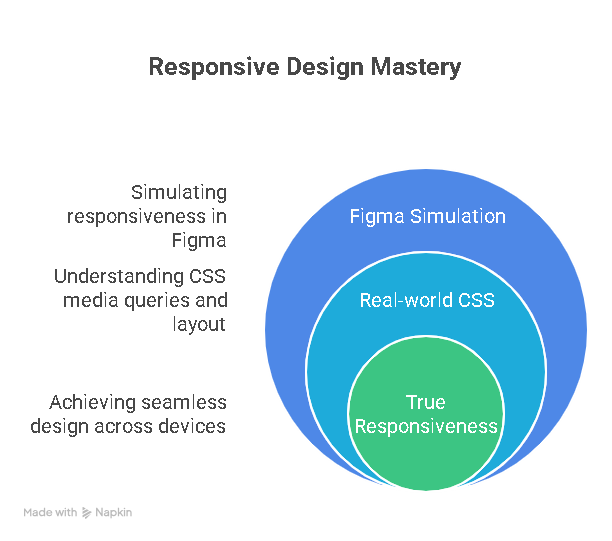
Responsiveness: In Figma, you can create what looks like a responsive design. You can use Auto Layout and constraints to simulate how elements should behave on different screen sizes. But this is still a simulation. The reality of CSS media queries, flexbox, and grid can be a different beast altogether. What works perfectly in a controlled Figma environment might break spectacularly on a real device. Ensuring your design is truly responsive across a multitude of screen sizes and devices is a significant challenge, and it requires a deep understanding of both design principles and front-end development.
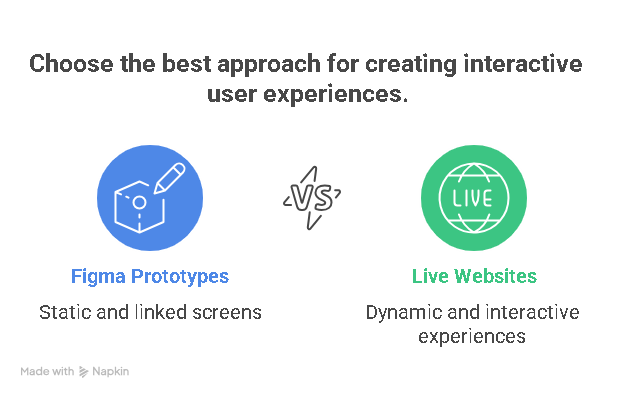
Interactivity: Figma prototypes can be incredibly sophisticated, but they are still, at their core, a series of static screens linked together. A live website, on the other hand, is a dynamic, interactive experience. Translating the feeling of an interaction from a Figma prototype to a functional web element requires more than just copying and pasting code. It requires a thoughtful approach to user experience, considering things like loading states, error messages, and all the other little details that make a website feel alive and responsive.
Performance: It’s easy to get carried away in Figma, adding high-resolution images, complex vector graphics, and intricate animations. But every element you add has a cost in terms of performance. A design that looks beautiful in Figma can result in a slow, bloated website if not optimized correctly. This is where the expertise of a developer is crucial, as they can make informed decisions about things like image compression, code minification, and caching to ensure your website is not only beautiful but also fast and efficient.
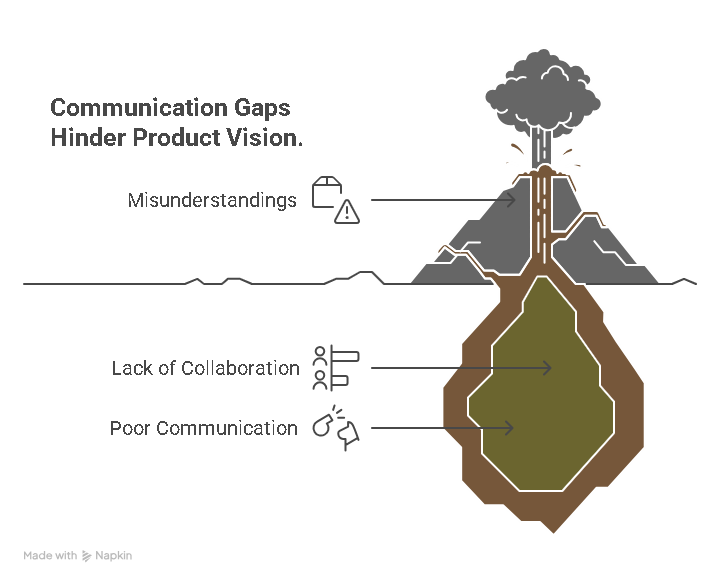
Communication Gaps: The classic designer-developer handoff. The designer throws a Figma file over the virtual wall, and the developer is left to decipher it. This often leads to misunderstandings, frustration, and a final product that doesn’t quite match the original vision. The key to avoiding this is to foster a collaborative environment where designers and developers work together from the very beginning, communicating openly and frequently throughout the entire process.
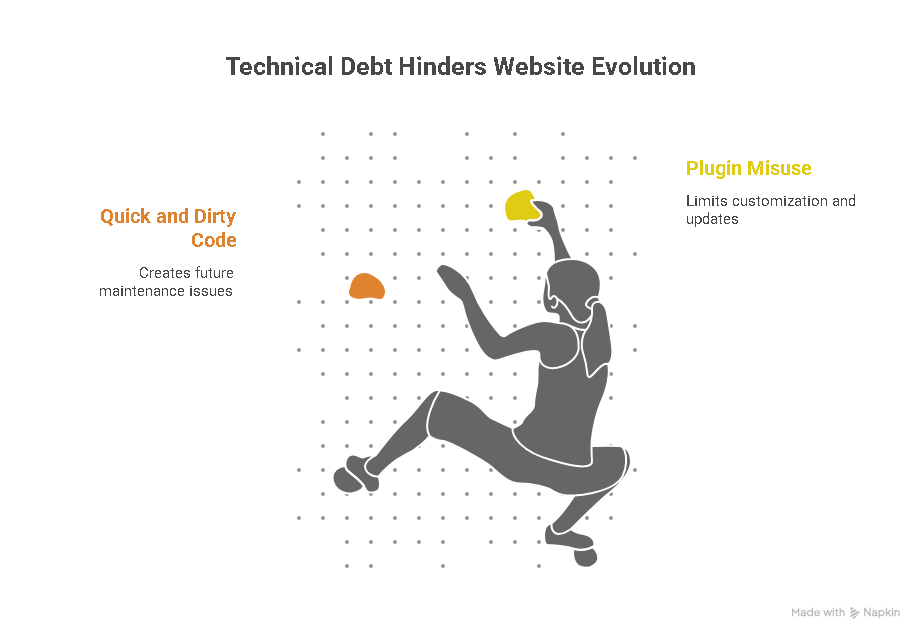
Technical Debt: In the rush to get a website live, it’s tempting to take shortcuts. Maybe you use a plugin that almost does what you want, or you write some quick and dirty code to fix a layout issue. While these solutions might work in the short term, they can lead to a mountain of technical debt down the road, making your website difficult to maintain, update, and scale.
These challenges might seem daunting, but don’t despair! With the right approach, they are all surmountable. In the next section, we’ll explore the different methods for converting your Figma designs to WordPress, each with its own set of pros and cons.
Bridging the Gap: Methods for Figma to WordPress Conversion
Now for the main event: how do we actually get that beautiful Figma design into a functional WordPress website? There are several paths you can take, each with its own unique set of advantages and disadvantages. The right choice for you will depend on your project’s complexity, your budget, your timeline, and your team’s skillset.
A. Manual Coding (The Developer’s Craft)
This is the traditional, time-honoured approach. It involves a skilled developer taking your Figma design and manually writing the HTML, CSS, and JavaScript code to bring it to life. This code is then integrated into a custom WordPress theme, giving you a website that is a true one-of-a-kind creation.
- The Process: The developer will start by exporting all the necessary assets from your Figma file, such as images, icons, and fonts. They will then meticulously write the HTML structure, style it with CSS to match your design pixel for pixel and add any necessary JavaScript for interactivity. Finally, they will integrate this front-end code into a WordPress theme, making sure to leverage WordPress’s powerful features like custom post types, advanced custom fields, and the block editor.
- Pros: The biggest advantage of manual coding is the level of control it provides. You are not limited by the constraints of a pre-built theme or page builder. You can create a truly custom design with unique interactions and animations. The resulting code is also typically much cleaner and more optimized, leading to a faster, more performant website. This approach also allows for greater flexibility and scalability in the long run.
- Cons: The downside of manual coding is that it is the most time-consuming and expensive option. It requires the expertise of a skilled developer, which can be a significant investment. It also means that any future design changes will likely require a developer’s intervention.
- Best for: Highly custom designs, complex web applications, and websites where performance is a top priority.
B. Using Page Builders (e.g., Elementor, Divi)
Page builders have revolutionized the WordPress world, allowing users to create beautiful, professional-looking websites without writing a single line of code. These tools provide a visual, drag-and-drop interface that makes it easy to build complex layouts and add a wide range of features to your website.
- The Process: With a page builder, you essentially rebuild your Figma design within the WordPress environment. Many page builders now offer Figma integration plugins that can help streamline this process, allowing you to import your design assets and styles directly into the page builder. You then use the page builder’s visual interface to arrange your content, customize your design, and add any necessary functionality.
- Pros: The main advantage of page builders is their speed and ease of use. You can create a fully functional website in a fraction of the time it would take to code it manually. They are also much more budget-friendly, as you don’t need to hire a developer. The visual editing interface also makes it easy for non-technical users to make changes and updates to their website.
- Cons: The trade-off for this convenience is a loss of control and flexibility. You are limited by the features and design options of the page builder you choose. The code generated by page builders can also be bloated and inefficient, which can negatively impact your website’s performance. There is also a learning curve involved in mastering a page builder, and you may find yourself locked into a particular ecosystem.
- Best for: Small to medium-sized websites, designers who don’t have coding skills, and rapid prototyping.
C. Figma to WordPress Plugins/Tools (e.g., UiChemy, Yotako, Fignel)
A new generation of tools has emerged that promise to automate the Figma to WordPress conversion process. These plugins and tools analyze your Figma design and automatically generate the corresponding WordPress theme or block editor code.
- The Process: The process is typically very straightforward. You install a plugin in Figma, select the design you want to convert, and the tool does the rest. The output can vary from a complete WordPress theme to individual blocks that you can use in the WordPress editor.
- Pros: The main benefit of these tools is their speed. You can convert a Figma design to a WordPress website in a matter of minutes, which is a huge time-saver. They also significantly reduce the amount of manual effort required, freeing you up to focus on other aspects of your project.
- Cons: The quality of the generated code can be a mixed bag. While some tools are getting better, many still produce code that is messy, inefficient, and difficult to customize. You are also limited by the features and capabilities of the tool, and you may find that you need to do a lot of manual tweaking to get the desired result. There is also the risk of vendor lock-in, as you may be dependent on the tool for future updates and maintenance.
- Best for: Simple designs, quick proof-of-concepts, and situations where speed is the top priority.
Best Practices for a Smooth Transition
Regardless of the method you choose, there are several best practices you can follow to ensure a smoother, more successful Figma to WordPress conversion. It all starts with a little preparation and a lot of communication.
A. Figma Side Preparation
Before you even think about converting your design, take some time to clean up and organize your Figma file. This will make the handoff process much smoother, whether you’re handing it off to a developer or a conversion tool.
- Organize Your Layers and Components: A clean and well-organized Figma file is a developer’s best friend. Use a consistent naming convention for your layers and components and group them logically. This will make it much easier for the developer to understand your design and translate it into code.
- Use Styles and Variables: Figma’s styles and variables are incredibly powerful tools for maintaining consistency in your design. Use them to define your color palette, typography, and spacing. This will not only make your design more consistent but also make it much easier to make global changes down the road.
- Design with Responsiveness in Mind: Don’t just create a static design for a single screen size. Use Figma’s Auto Layout and constraints to create a responsive design that adapts to different screen sizes. This will give your developer a much clearer understanding of how your design should behave on different devices.
- Provide a Clear Handoff: Don’t just throw your Figma file over the wall. Provide your developer with a clear and comprehensive handoff package. This should include a style guide, exported assets, and detailed notes on any complex interactions or animations.
B. WordPress Side Implementation
Once you’re ready to start building your website in WordPress, there are a few things you can do to set yourself up for success.
- Choose the Right Method: As we discussed earlier, there are several different methods for converting your Figma design to WordPress. Choose the one that best aligns with your project’s complexity, your budget, and your team’s skillset.
- Start with a Lightweight Theme: Don’t start with a bloated, feature-heavy theme. Choose a lightweight, flexible theme like Generate Press or Astra. This will give you a solid foundation to build upon, without all the unnecessary bells and whistles.
- Use a Child Theme: This is a golden rule of WordPress development. Always use a child theme for your customizations. This will ensure that your changes are not overwritten when you update your parent theme.
- Optimize for Performance: Don’t wait until the end of your project to think about performance. Optimize your images, use a caching plugin, and minimize the number of plugins you use. A fast and performant website is crucial for a good user experience.
- Test, Test, Test: Before you launch your website, make sure to test it thoroughly. Test it on different browsers, different devices, and different screen sizes. Check for any accessibility issues, and make sure that all of your forms and interactive elements are working correctly.
A Human Touch: Beyond the Code
While tools and techniques are essential, the most successful Figma to WordPress conversions often come down to something far less technical: human connection and understanding. As a full-stack development consultant with a passion for content, I’ve seen firsthand how crucial this ‘human touch’ is.
Collaboration is Key: This isn’t just a buzzword; it’s the bedrock of a successful project. Designers and developers often speak different languages, focusing on different aspects of a project. Designers dream in pixels and user flows, while developers think in functions and databases. The magic happens when these two worlds collide constructively. Regular check-ins, shared understanding of project goals, and a willingness to compromise can turn potential conflicts into creative solutions. It’s about building a bridge of empathy, where each side appreciates the challenges and expertise of the other.
Embrace Iteration: The journey from design to a live website is rarely a straight line. There will be bumps, detours, and moments where you realize a brilliant Figma concept just doesn’t translate perfectly to the web without significant performance compromises. This is where iteration comes in. Instead of viewing these as failures, see them as opportunities to refine, adapt, and improve. A flexible mindset, both from the designer and the developer, allows for adjustments that ultimately lead to a better end product.
Understanding Limitations: Sometimes, a design might be breathtakingly beautiful in Figma, but incredibly complex, slow, or even impossible to implement efficiently on a web platform, especially within budget or timeline constraints. A human-centric approach means having honest conversations about these limitations early on. It’s about finding creative workarounds, simplifying elements without sacrificing the core vision, and making informed decisions that balance aesthetics with practicality and performance. The goal isn’t just to replicate a design; it’s to create an exceptional user experience that performs well.
The User Experience Above All: Ultimately, our goal isn’t just pixel perfection or clean code; it’s to create a website that serves its users effectively. A human-like blog post about this process wouldn’t be complete without emphasizing that the end-user’s experience should always be the guiding star. Is the site fast? Is it easy to navigate? Does it convey the intended message? Sometimes, a slight deviation from the Figma design might actually improve the user experience on the live site. Keeping this perspective ensures that our technical efforts are always aligned with the ultimate purpose of the website.
Conclusion: Your Figma Design, Live and Thriving
The journey from a brilliant Figma design to a fully functional WordPress website can feel like traversing a vast canyon. But as we’ve explored, it’s a journey filled with exciting possibilities, provided you approach it with the right mindset and tools. Whether you choose the meticulous craft of manual coding, the visual power of page builders, or the rapid automation of specialized plugins, success hinges on understanding the nuances of each method and, crucially, embracing a collaborative, human-centered approach.
It’s about more than just converting files; it’s about translating a vision. It’s about maintaining design fidelity while ensuring responsiveness, optimizing for performance, and fostering seamless communication between designers and developers. When these elements align, the result isn’t just a website; it’s a thriving digital experience that truly reflects the original design intent and serves its users beautifully. So go forth, bridge that gap, and watch your Figma designs come alive on the web!
Contact us today at enquiry@smartwebagency.co.uk for consultation and turning figma designs to live website