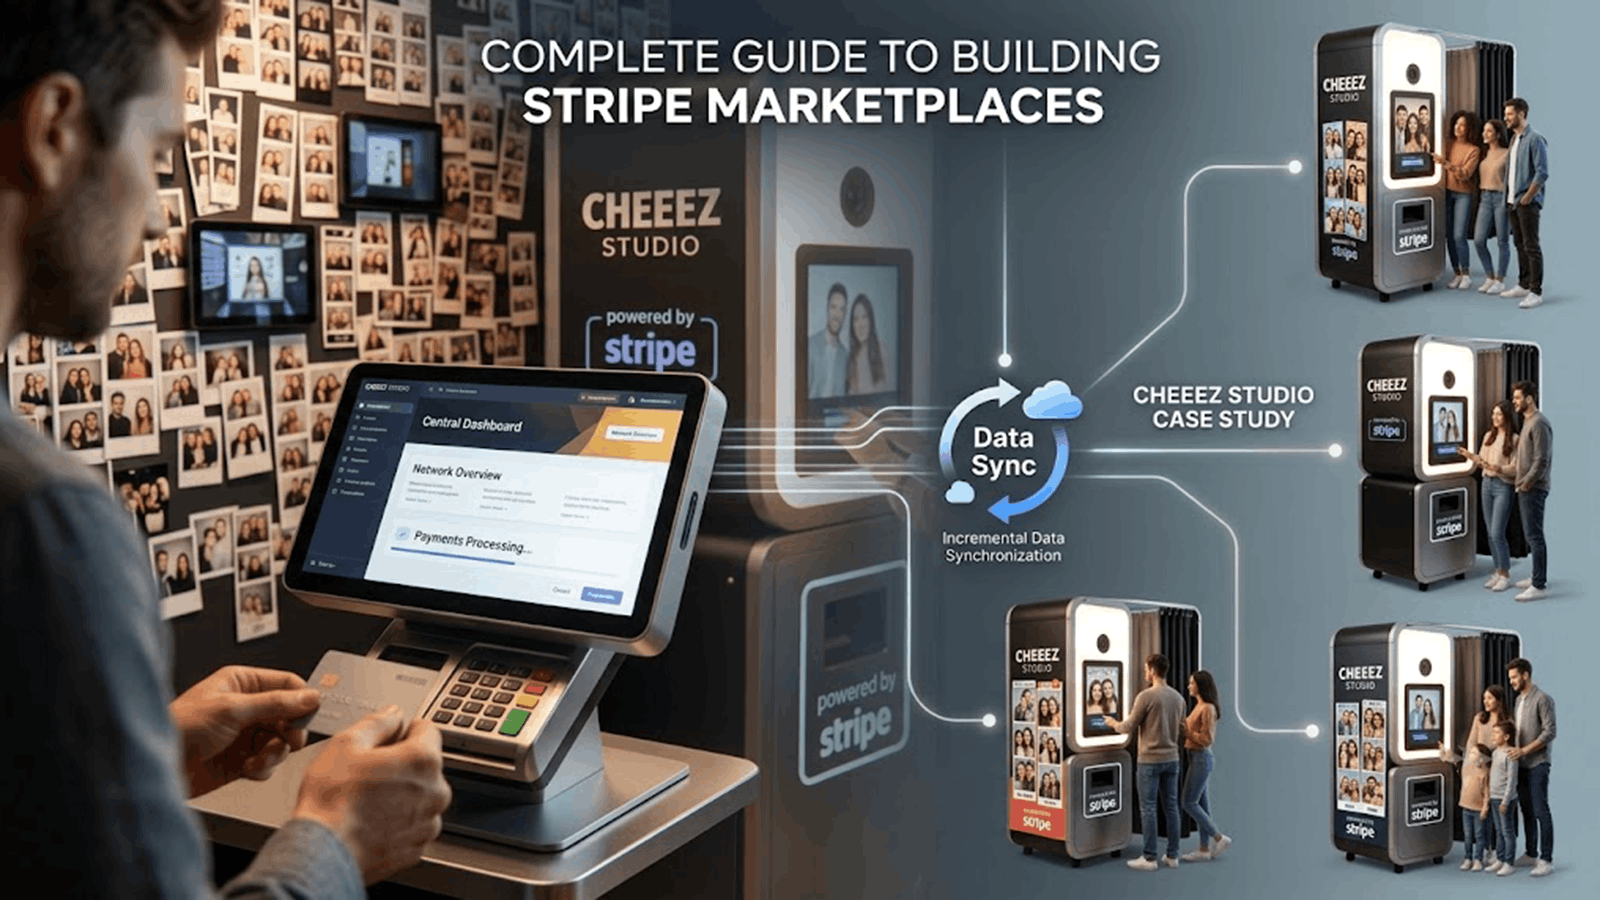
Cheeez Studio is a UK photo booth franchise that processes card payments through Stripe at every location. As the network grew, consolidating revenue, calculating franchise fees and producing accurate reports across multiple Stripe accounts became a significant administrative burden. This case study describes the custom software development project we delivered to solve that problem: a central platform that brings marketplace payments, fee calculation and reporting together for the entire network.
The sections below cover the challenge in detail, the architecture we chose, what was built and the results, followed by recommendations for any business managing revenue across more than one Stripe account.
Step 1: OAuth Authentication
Dubai Pay requires a Bearer access token before any API call can be made.
Generating Access Token
function getAccessToken($clientId, $clientSecret)
{
$url = “https://ids.qa.dubai.gov.ae/oauth2/token”;
$credentials = base64_encode($clientId . “:” . $clientSecret);
$ch = curl_init($url);
curl_setopt_array($ch, [
CURLOPT_RETURNTRANSFER => true,
CURLOPT_POST => true,
CURLOPT_HTTPHEADER => [
“Authorization: Basic ” . $credentials,
“Content-Type: application/x-www-form-urlencoded”
],
CURLOPT_POSTFIELDS => http_build_query([
“grant_type” => “client_credentials”,
“scope” => “openid”
])
]);
$response = curl_exec($ch);
curl_close($ch);
}
The Challenge: One Franchise, Many Stripe Accounts
Cheeez Studio operates photo booths through a network of franchisees and branches. Each location processes card payments through its own Stripe account, which works well at the point of sale. The difficulty was administrative.
Head office needed to monitor what each location was earning, separate photo booth revenue from camera and merchandise sales, calculate the franchise and marketing fees due to HQ, and issue accurate invoices at the end of each period. That information was being assembled manually from separate Stripe Dashboard logins, one for every location. The process was slow, prone to error, and became less workable with each new franchisee that joined.
The requirement was clear: franchise software that consolidated the entire network into a single system without changing how any customer pays.
Step 1: OAuth Authentication
Dubai Pay requires a Bearer access token before any API call can be made.
Generating Access Token
function getAccessToken($clientId, $clientSecret)
{
$url = “https://ids.qa.dubai.gov.ae/oauth2/token”;
$credentials = base64_encode($clientId . “:” . $clientSecret);
$ch = curl_init($url);
curl_setopt_array($ch, [
CURLOPT_RETURNTRANSFER => true,
CURLOPT_POST => true,
CURLOPT_HTTPHEADER => [
“Authorization: Basic ” . $credentials,
“Content-Type: application/x-www-form-urlencoded”
],
CURLOPT_POSTFIELDS => http_build_query([
“grant_type” => “client_credentials”,
“scope” => “openid”
])
]);
$response = curl_exec($ch);
curl_close($ch);
}
The Architecture: A Single Platform Over Separate Stripe Accounts
An important early decision was where the consolidation should happen. Because each location already received its funds directly into its own Stripe account, no payment split was needed at the point of payment. The money was already settling in the right place. What was missing was visibility.
We therefore built the marketplace layer at the data level. The platform holds encrypted API credentials for every franchisee and branch, connects to each Stripe account in turn, and imports transactions into a single database. Syncing is incremental: the system records when each location was last updated and only retrieves new activity, which keeps sync times short even as transaction history grows.
This approach gave head office the oversight a marketplace platform provides while leaving every location's live payment processing untouched.
Step 1: OAuth Authentication
Dubai Pay requires a Bearer access token before any API call can be made.
Generating Access Token
function getAccessToken($clientId, $clientSecret)
{
$url = “https://ids.qa.dubai.gov.ae/oauth2/token”;
$credentials = base64_encode($clientId . “:” . $clientSecret);
$ch = curl_init($url);
curl_setopt_array($ch, [
CURLOPT_RETURNTRANSFER => true,
CURLOPT_POST => true,
CURLOPT_HTTPHEADER => [
“Authorization: Basic ” . $credentials,
“Content-Type: application/x-www-form-urlencoded”
],
CURLOPT_POSTFIELDS => http_build_query([
“grant_type” => “client_credentials”,
“scope” => “openid”
])
]);
$response = curl_exec($ch);
curl_close($ch);
}
What the Custom Software Development Involved
The platform was built in Laravel, the framework our Laravel development team uses for most payment related projects because it keeps complex business rules organised and testable.
The core capabilities:
- Automatic import of transactions and products from every location's Stripe account.
- Revenue categorisation, so photo booth income and camera or merchandise sales are reported separately, down to individual line items where available.
- Fee calculation, applying VAT, franchise fees and marketing fees at the agreed rates, with the applied rates stored against each transaction to preserve an audit trail.
- Invoice and report generation, exportable as PDF and Excel documents.
- A network wide dashboard for head office, alongside individual reporting for each franchisee and branch.
Because rates are stored with each transaction, historical reports remain accurate even if fee structures change later. This audit trail proved to be one of the most valuable design decisions in the project.
Step 1: OAuth Authentication
Dubai Pay requires a Bearer access token before any API call can be made.
Generating Access Token
function getAccessToken($clientId, $clientSecret)
{
$url = “https://ids.qa.dubai.gov.ae/oauth2/token”;
$credentials = base64_encode($clientId . “:” . $clientSecret);
$ch = curl_init($url);
curl_setopt_array($ch, [
CURLOPT_RETURNTRANSFER => true,
CURLOPT_POST => true,
CURLOPT_HTTPHEADER => [
“Authorization: Basic ” . $credentials,
“Content-Type: application/x-www-form-urlencoded”
],
CURLOPT_POSTFIELDS => http_build_query([
“grant_type” => “client_credentials”,
“scope” => “openid”
])
]);
$response = curl_exec($ch);
curl_close($ch);
}
The Results for Cheeez Studio
Reporting that previously required hours of manual work across multiple Stripe Dashboard sessions is now available in minutes. Fee invoices are consistent, and every figure can be traced back to a specific Stripe transaction, which has removed ambiguity from conversations between head office and franchisees. Adding a new location to the network now involves completing a form rather than restructuring spreadsheets.
Step 1: OAuth Authentication
Dubai Pay requires a Bearer access token before any API call can be made.
Generating Access Token
function getAccessToken($clientId, $clientSecret)
{
$url = “https://ids.qa.dubai.gov.ae/oauth2/token”;
$credentials = base64_encode($clientId . “:” . $clientSecret);
$ch = curl_init($url);
curl_setopt_array($ch, [
CURLOPT_RETURNTRANSFER => true,
CURLOPT_POST => true,
CURLOPT_HTTPHEADER => [
“Authorization: Basic ” . $credentials,
“Content-Type: application/x-www-form-urlencoded”
],
CURLOPT_POSTFIELDS => http_build_query([
“grant_type” => “client_credentials”,
“scope” => “openid”
])
]);
$response = curl_exec($ch);
curl_close($ch);
}
Recommendations for Similar Projects
Based on this build, we would offer the following guidance to any business planning marketplace style reporting:
- Establish where funds need to settle before choosing an architecture. If money already reaches the right parties, consolidation at the data level is often simpler and less disruptive than restructuring payments.
- Store fee rates against each transaction rather than applying them at report time. Rates change, and historical figures should not.
- Design for incremental syncing from the start. Importing full transaction histories on every refresh does not scale.
- Treat the project as digital transformation of the reporting process rather than a payments add on. Most of the value is created after the payment itself.
- Allow for ongoing website maintenance. Stripe's API evolves, and a payments platform needs continued attention after launch.
Step 1: OAuth Authentication
Dubai Pay requires a Bearer access token before any API call can be made.
Generating Access Token
function getAccessToken($clientId, $clientSecret)
{
$url = “https://ids.qa.dubai.gov.ae/oauth2/token”;
$credentials = base64_encode($clientId . “:” . $clientSecret);
$ch = curl_init($url);
curl_setopt_array($ch, [
CURLOPT_RETURNTRANSFER => true,
CURLOPT_POST => true,
CURLOPT_HTTPHEADER => [
“Authorization: Basic ” . $credentials,
“Content-Type: application/x-www-form-urlencoded”
],
CURLOPT_POSTFIELDS => http_build_query([
“grant_type” => “client_credentials”,
“scope” => “openid”
])
]);
$response = curl_exec($ch);
curl_close($ch);
}
FAQs
Does consolidating Stripe data change how customers pay?
No. Payments continue to run through each location's existing Stripe account. The platform only reads transaction data, so checkout behaviour is unaffected.
Can one dashboard cover multiple Stripe accounts?
Yes. Each account is synced individually and the data is combined in one database, so the Stripe Dashboard remains available to every location while head office sees the full network.
What happens when fee percentages change?
Because rates are stored with every transaction, historical reports keep their original figures and new rates apply only from the date they change.
Is Laravel suitable for this kind of platform?
Yes. Stripe's PHP SDK integrates cleanly with Laravel, and the framework handles scheduled syncing, queued jobs and document exports reliably.
Planning a Similar Platform?
Smart Web Agency is a web agency and web development company working with businesses across the UK. Our services cover custom software development, Stripe integration, website maintenance and website optimisation, and our AI development team supports clients looking to go further. If your payments run smoothly but your reporting does not, get in touch and we will be glad to advise.
Step 1: OAuth Authentication
Dubai Pay requires a Bearer access token before any API call can be made.
Generating Access Token
function getAccessToken($clientId, $clientSecret)
{
$url = “https://ids.qa.dubai.gov.ae/oauth2/token”;
$credentials = base64_encode($clientId . “:” . $clientSecret);
$ch = curl_init($url);
curl_setopt_array($ch, [
CURLOPT_RETURNTRANSFER => true,
CURLOPT_POST => true,
CURLOPT_HTTPHEADER => [
“Authorization: Basic ” . $credentials,
“Content-Type: application/x-www-form-urlencoded”
],
CURLOPT_POSTFIELDS => http_build_query([
“grant_type” => “client_credentials”,
“scope” => “openid”
])
]);
$response = curl_exec($ch);
curl_close($ch);
}
Step 1: OAuth Authentication
Dubai Pay requires a Bearer access token before any API call can be made.
Generating Access Token
function getAccessToken($clientId, $clientSecret)
{
$url = “https://ids.qa.dubai.gov.ae/oauth2/token”;
$credentials = base64_encode($clientId . “:” . $clientSecret);
$ch = curl_init($url);
curl_setopt_array($ch, [
CURLOPT_RETURNTRANSFER => true,
CURLOPT_POST => true,
CURLOPT_HTTPHEADER => [
“Authorization: Basic ” . $credentials,
“Content-Type: application/x-www-form-urlencoded”
],
CURLOPT_POSTFIELDS => http_build_query([
“grant_type” => “client_credentials”,
“scope” => “openid”
])
]);
$response = curl_exec($ch);
curl_close($ch);
}
If you’re setting up a modern and scalable Moodle 4.5 LTS environment on Ubuntu 22.04, this guide will walk you through a clean and production-friendly installation workflow. We’re assuming that Nginx, PHP (8.1 or 8.2), and MySQL are already installed and as well as a database and DB user prepared ahead of time.
The starting point is cloning Moodle from the official Git repository:
sudo git clone -b MOODLE_405_STABLE https://github.com/moodle/moodle.git /var/www/html/moodle
Make sure to update all placeholders marked as <EDIT> before running commands.
1. Create the moodledata Directory
Moodle stores all user-generated content in a non-web-accessible directory. Let’s create it with proper permissions:
I am using /var/www/html for moodle so I will b creating moodledata folder in www folder.
sudo mkdir -p /var/www/moodledata
sudo chown -R www-data:www-data /var/www/moodledata
sudo chmod -R 770 /var/www/moodledata
2. Prepare a PHP Upload Temp Directory
This is a very important step, if the temporary upload directory isn’t set up properly, file uploads won’t work correctly.
sudo mkdir -p /var/www/php-tmp
sudo chown -R www-data:www-data /var/www/php-tmp
sudo chmod 733 /var/www/php-tmp
Update PHP:
Now go to the php.ini file, search for upload_tmp_dir, and set its value to:
upload_tmp_dir = /var/www/php-tmp
Restart PHP-FPM:
After setting the value, restart PHP-FPM.
sudo systemctl restart php8.2-fpm
3. Set Permissions for Moodle Code
Moodle needs the correct permissions to run properly. These commands give ownership of the Moodle folder to the web server and set safe permissions so directories and files can be read and used correctly while staying secure:
sudo chown -R www-data:www-data /var/www/html/moodle
sudo find /var/www/html/moodle -type d -exec chmod 755 {} \;
sudo find /var/www/html/moodle -type f -exec chmod 644 {} \;
4. Configure Nginx
Create the server block in /etc/nginx/sites-available/moodle
Paste the following (update server name and PHP socket if needed):
server {
listen 80;
server_name moodle.test;
root /var/www/html/moodle;
index index.php;
client_max_body_size 200M;
access_log /var/log/nginx/moodle_access.log;
error_log /var/log/nginx/moodle_error.log;
location / {
try_files $uri $uri/ /index.php?$query_string;
}
location ~ ^(.+\.php)(/.+)?$ {
fastcgi_split_path_info ^(.+\.php)(/.+)$;
include fastcgi_params;
fastcgi_param SCRIPT_FILENAME $document_root$fastcgi_script_name;
fastcgi_param PATH_INFO $fastcgi_path_info;
fastcgi_param PATH_TRANSLATED $document_root$fastcgi_path_info;
fastcgi_pass unix:/run/php/php8.2-fpm.sock;
}
location /moodledata { deny all; }
}
5. Enable the Site and Reload Nginx
sudo ln -sf /etc/nginx/sites-available/moodle /etc/nginx/sites-enabled/moodle
sudo nginx -t
sudo systemctl reload nginx
6. Install Moodle Using CLI
This command runs Moodle’s built-in installer from the command line. It sets your site URL, data folder, database details, and admin account, and completes the installation automatically without asking questions:
sudo -u www-data php /var/www/html/moodle/admin/cli/install.php –wwwroot=http://moodle.test –dataroot=/var/www/moodledata –dbtype=mysqli –dbname=<DB_NAME> –dbuser=<DB_USER> –dbpass='<DB_PASS>’ –fullname=’SWA University LMS’ –shortname=’SWA University’ –adminuser=admin –adminpass=’Admin123!’ –agree-license –non-interactive
7. Post-Install Developer Adjustments
These commands adjust file permissions after installation. They give you ownership of the Moodle code so you can edit it, set safe permissions for the config.php file, and restore the correct ownership and permissions on the moodledata folder so Moodle can store files properly:
sudo chown -R $USER:$USER /var/www/html/moodle
sudo chown $USER:www-data /var/www/html/moodle/config.php
sudo chmod 664 /var/www/html/moodle/config.php
sudo chown -R www-data:www-data /var/www/moodledata
sudo chmod -R 770 /var/www/moodledata
8. Purge Caches & Enable Cron
This command clears all Moodle caches to make sure the site loads fresh settings and files after installation or configuration changes:
sudo -u www-data php /var/www/html/moodle/admin/cli/purge_caches.php
Cron setup:
This cron job runs Moodle’s scheduled tasks every minute. It is required for Moodle to function correctly. Without it, many features such as emails, enrollments, cleanups, and background tasks will not work properly:
* * * * * /usr/bin/php /var/www/html/moodle/admin/cli/cron.php >/dev/null 2>&1
9. Quick Validation Checks
After installation, run these quick checks to make sure your Moodle site is working correctly and that there are no permission or configuration issues:
– Visit http://moodle.test
– curl -I http://moodle.test/pluginfile.php (expect 404 or HTML, not 502/500)
– If JS/CSS missing, ensure correct PHP regex
– If upload fails, check permissions on php-tmp and moodledata
Conclusion
You now have a clean, fast, and production-ready Moodle 4.5 LTS installation on Ubuntu 22.04 using Git and Nginx. This setup is ideal for universities, enterprises, and organizations aiming for a robust and scalable learning platform.